How to Delete TeraBox Account: Step by Step Guide

TeraBox is a great option for those seeking free cloud storage with generous space to back up their photos and videos. Its popularity has surged in recent years, with over 100 million users taking advantage of its 1 TB of free storage. For many users, this is ample space to store their important data securely online.
However, sometimes, you might want to delete your TeraBox account – perhaps you’re switching to a different service or simply need a fresh start.
Important Note: If privacy or security concerns are the reason you’re considering deleting your TeraBox account, we recommend reading our review ‘Is TeraBox Safe?‘ before proceeding. This will help you make an informed decision.
08 Steps on How to Delete TeraBox Account
Since most people use TeraBox on their phones, you might expect to find the deletion option within the app itself. However, the option to delete your TeraBox account isn’t easily found in the app’s navigation. And if you’re reading this, you’ve likely noticed that already!
Don’t worry, the option is available right in the app, and I’ll guide you through the account deletion process step-by-step.
Caution
Deleting your account will permanently erase all your data from TeraBox. There’s no way to recover it afterward. Always download and back up your important files before proceeding. Additionally, if you have a TeraBox premium subscription, it will be canceled immediately.
Okay, let’s get started! Below are the 8 easy steps to delete your TeraBox account:
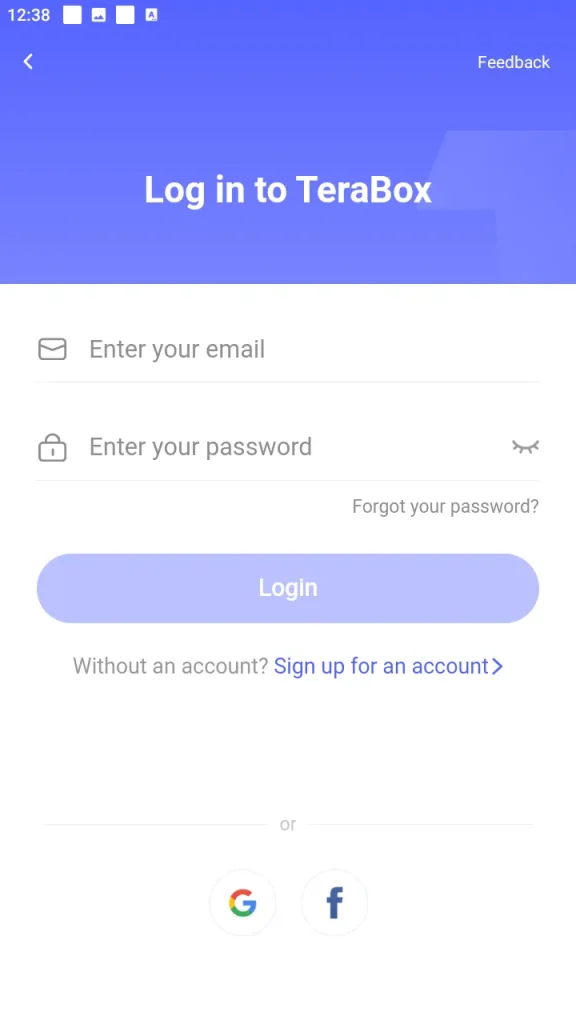
Step 1: Log in to your TeraBox Account
The first step in deleting your TeraBox account is to log in to TeraBox mobile app using your email and password. If you signed up using Google or Facebook, you can also log in through those services.
If you have more than one TeraBox account, be sure to double-check that you’re logged in to the correct account before proceeding.
Step 2: Go to Settings
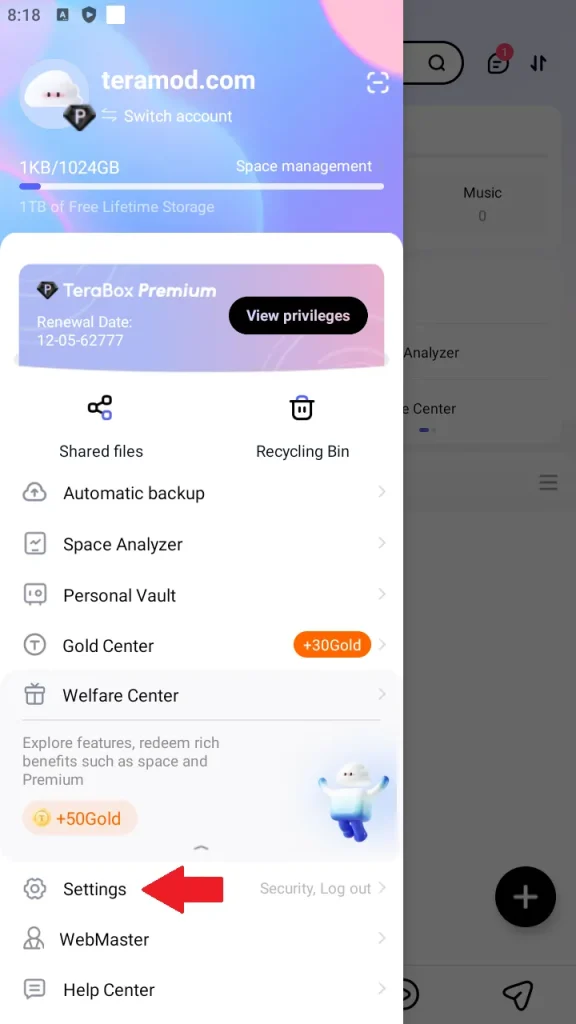
Once you are logged into your account, tap on your profile picture to access the app’s navigation menu. In the navigation menu, locate and tap the ‘Settings’ option.
Step 3: Go to Security Center
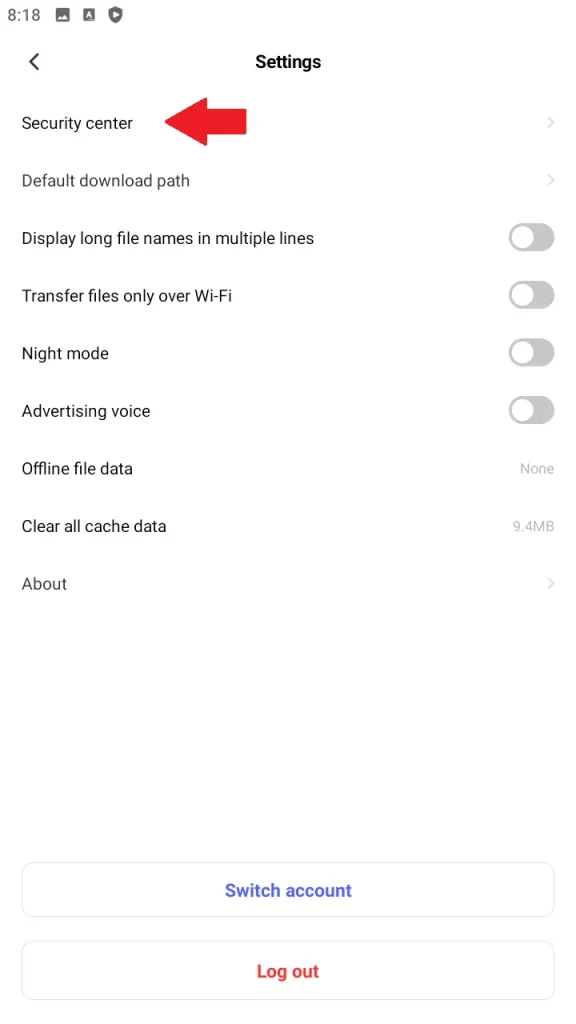
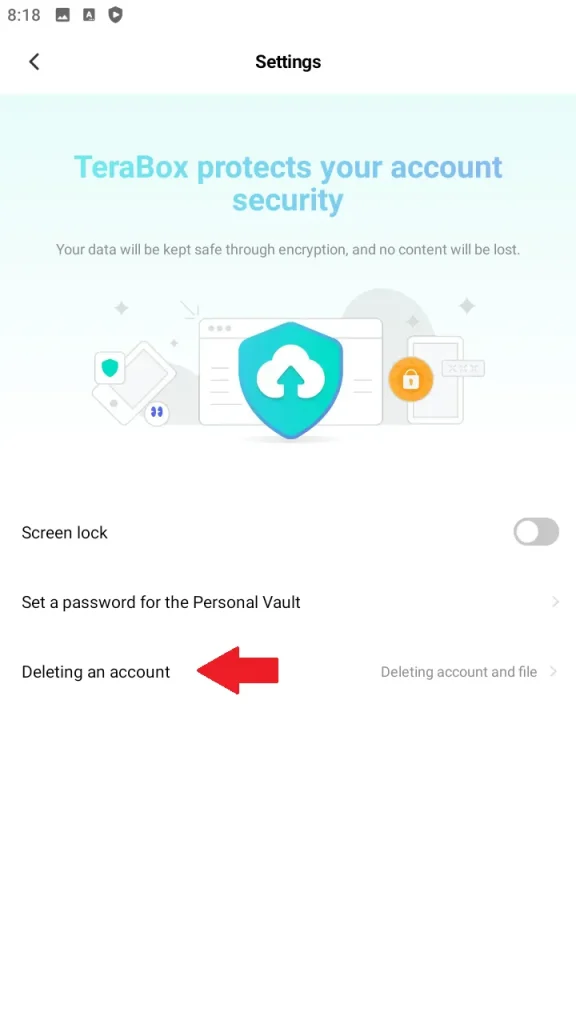
In the app settings, locate the ‘Security Center’ option. This is where you’ll find the option to delete your account.
Step 4: Tap on ‘Delete Account’
In the Security Center, You’ll see ‘Deleting an Account’ option (usually found at the bottom). Tap on this to proceed.
Step 5: Read the Risks Carefully
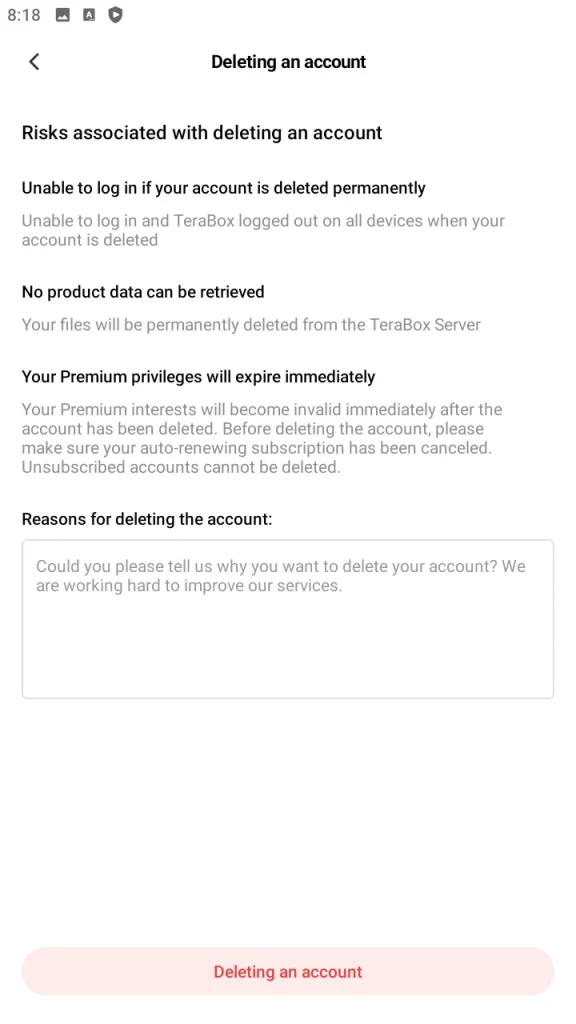
TeraBox will present a warning about the risks of deleting your account. Read this information carefully. Deleting your account is irreversible, and you will permanently lose access to your data, premium subscription (if applicable), and the account itself.
TeraBox may also provide a feedback section where you can explain your reasons for deleting your account. This helps them improve their service.
Step 6: Confirm Account Deletion
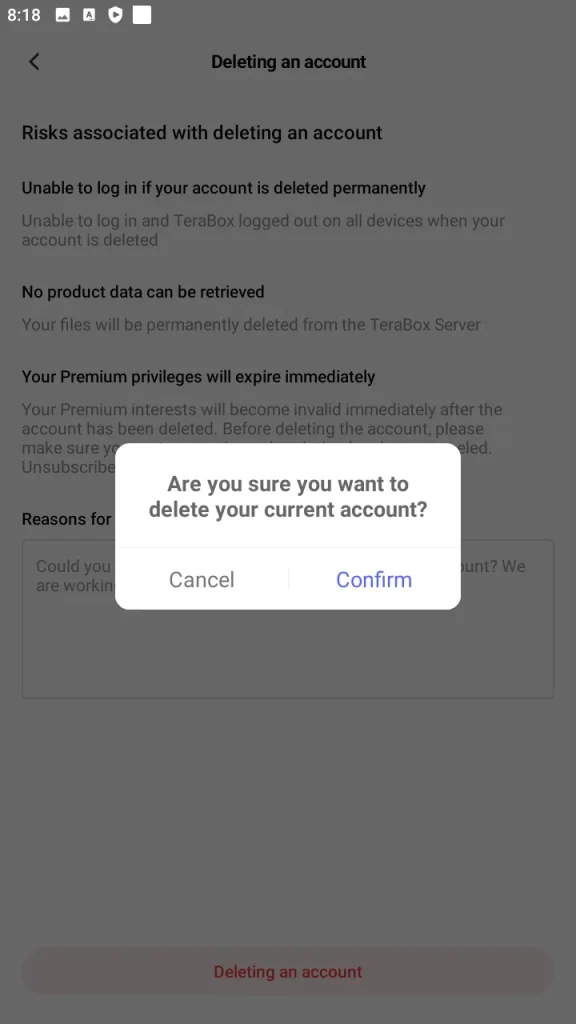
Once you understand the risks and are ready to delete the account, tap ‘Delete Account’. A popup will appear asking for confirmation.
Tap ‘Confirm’ to finalize the deletion process.
Step 7: Provide Security Verification
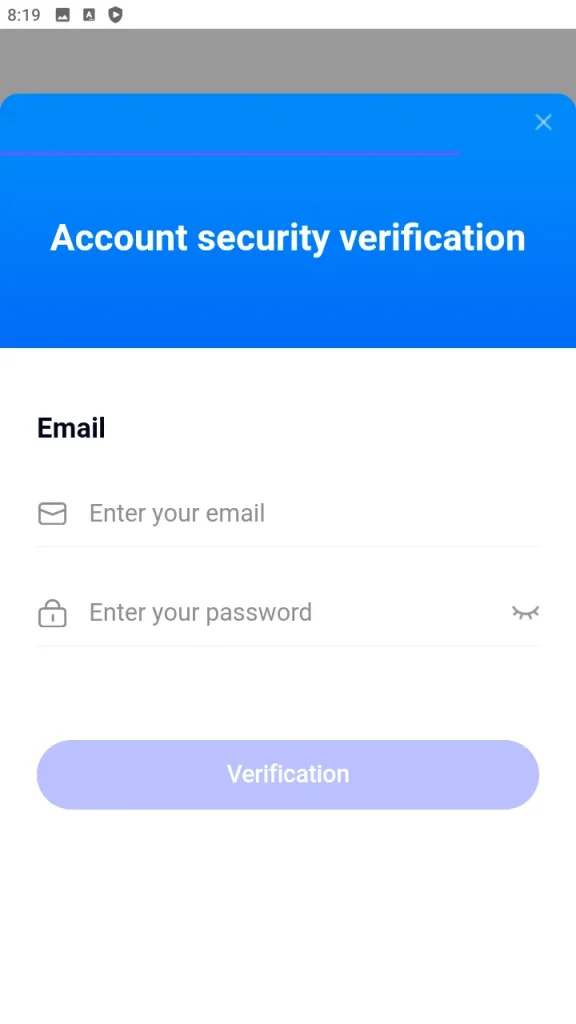
TeraBox will ask you to re-enter your email and password to confirm your identity and ensure it’s you who has authorized the account deletion.
Even at this step, you can stop the deletion process by not providing your credentials.
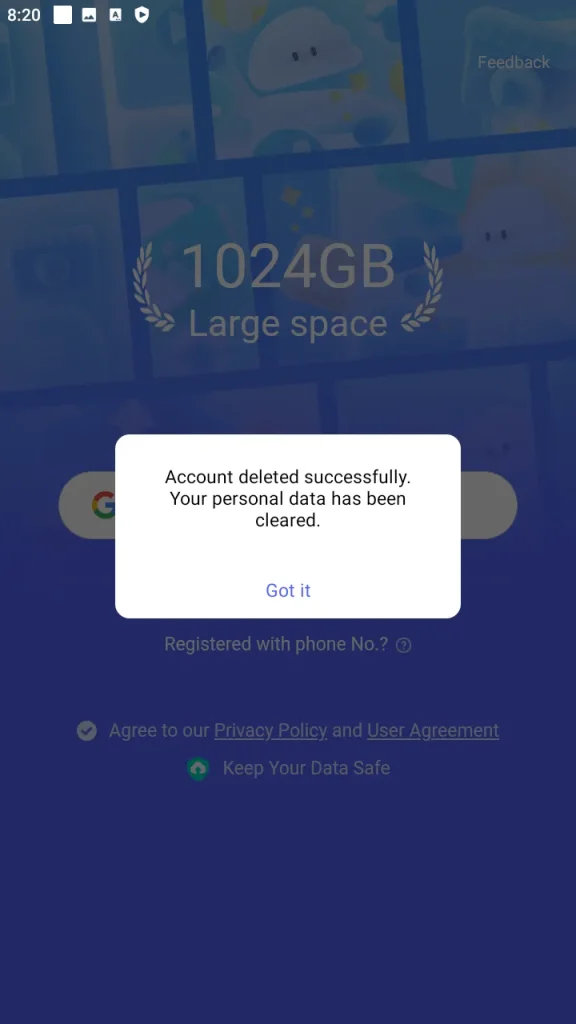
Step 8: Acknowledge Deletion
Once you have provided your credentials in the security verification step, TeraBox will immediately erase your data. A popup message will appear to inform you that your account has been successfully deleted.
You can acknowledge the message to go back to the new account sign up page.
What Happens After You Delete Your TeraBox Account?
Once TeraBox has confirmed your account deletion, all of your data is immediately and permanently erased from their servers. Any active premium memberships will be canceled immediately.
TeraBox does not offer the option to retrieve your data after deletion. You’ll be automatically logged out of all devices where you were previously logged in. However, files you’ve already downloaded to your mobile phone or computer’s local storage will remain unaffected.
Frequently Asked Questions
Still have questions? Find answers in our frequently asked questions.

